This article explains how to configure filters on Lightning calendar components. Configuring filters on VisualForce calendar components is explained here: Configure Filterable Fields
Filter Permissions - objects
The LWC filters works with two different sObjects for , Stored Filter Set and Stored Filter Set Values. For the filters to work a user needs read access to both objects.
In order to create/update/delete personal/global filters users required require create, update, and delete permission permissions on the Stored Filter Set sObject.
If a user has to be able to edit properties on a global filter that they don’t have normal edit permission on, they require create/update permission on the Stored Filter Set Values sObject as well.
Filter Permissions - custom permissions
There are two custom permissions that control a user’s level of access to filter configuration:
Create Personal Filters
Create Global Filters
| Info |
|---|
The ‘Create Personal Filters’ permission is a requirement for assigning the ‘Create Global Filters’ permission. |
Together, these two custom permissions create three tiers of access:
No permissions assigned:
The user sees global filters that have been shared with them. They are not able to create any filters.Create Personal Filters only:
Same as above, but the user is able to create new filters that are only visible to themselves.Create Personal Filters and Create Global Filters:
Same as above, but the user is able to create global filters that are visible to everyone (depending on sharing).
The Booker25 Admin permission set includes both these custom permission, and therefore grants the highest level of access. If you want any other users to have access to these permissions, you will have to manually assign them to profiles or your own permission sets.
To assign custom permissions, please refer to the official Salesforce documentation:
Selecting Filters
Users can select filters using the two buttons in the top left corner of the calendar component.
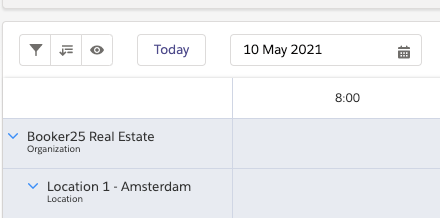
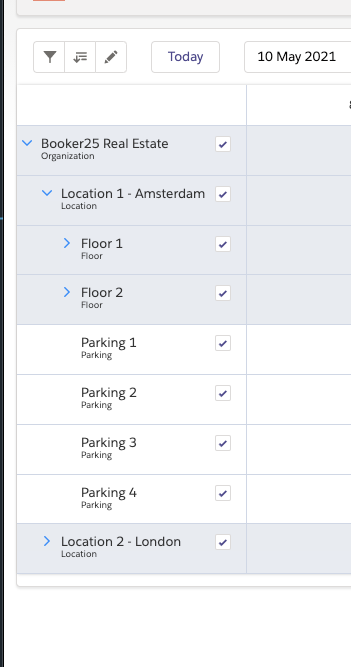
The left button (with the funnel icon) is for selecting dimension filters. Dimension filters control the dimension records that are visible on the calendar’s vertical axis. In other words, they control which rows are visible on the calendar. Dimension filters are only applicable to multi calendars. On single calendars this button is not visible.
The middle button (with the list icon and the down arrow) is for selecting reservation filters. Reservation filters control which reservations are visible on the calendar.
The right button (with the eye icon) is for selecting filtering the list of dimension by a checkbox.
Users without permissions
Even if a user has no permissions to create filters, they are still able to select which filter to apply if multiple filters are visible to them. Pictured below is a user without permissions, but with two reservation filters visible to them:
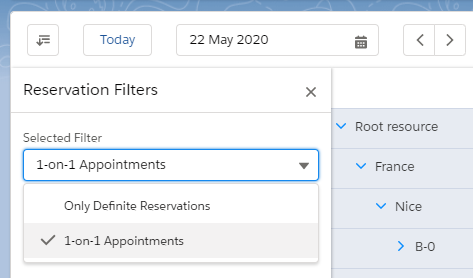

If no filters are visible to the user, the respective filter button will be hidden. If only one filter is visible, it always applies, so the filter button will also be hidden. If more than one filter is visible, the filter button will become visible, containing a dropdown to let the user make a choice between filters.
| Info |
|---|
On single dimension calendars, the dimension filter will always be hidden, regardless of user permissions. |
Creating Personal Dimension or Reservation Filters
Users that have the ‘Create Personal Filters’ permission are able to create new filters for themselves.
Open a filter panel by clicking on a filter button.
Click on the arrow to the right of the filter selection dropdown and select ‘New’.
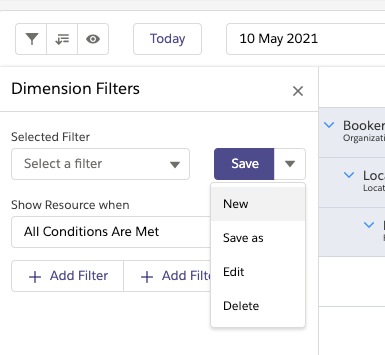
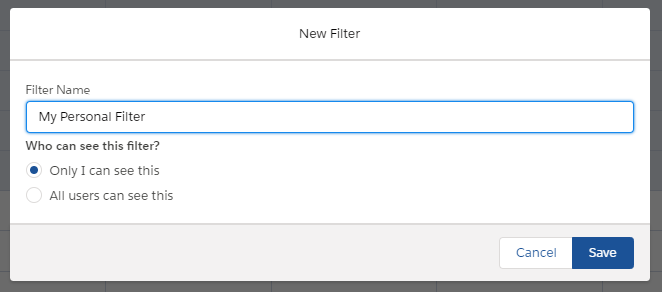
In the modal that opens up, give the filter a name and save it.
Click the ‘Add Filter’ button.
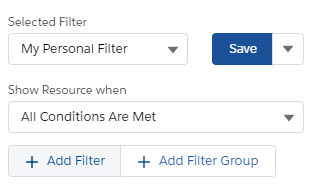
Click on the newly added filter item to set its properties.
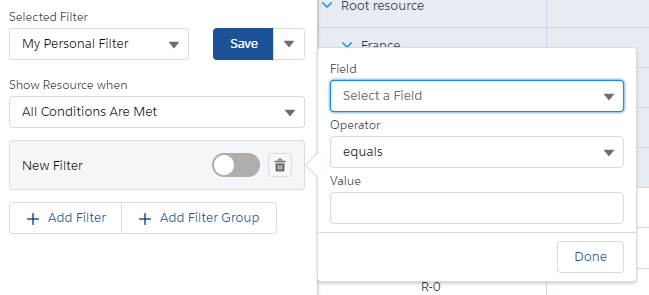
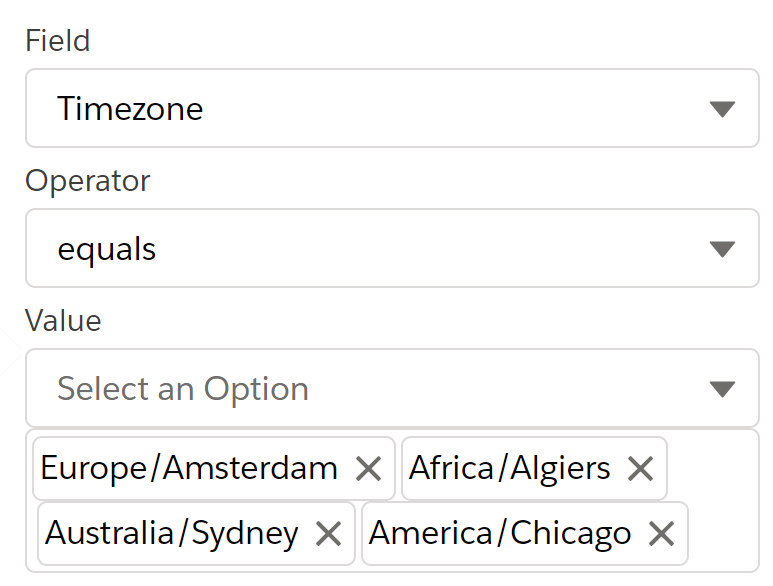
Field: the field this filter should look at.
Operator: the operator to apply (equals, less than, greater than, etc.).
Value: the comparison value. If the field is a lookup, you can search for a record by name.Click Done to save the filter item.
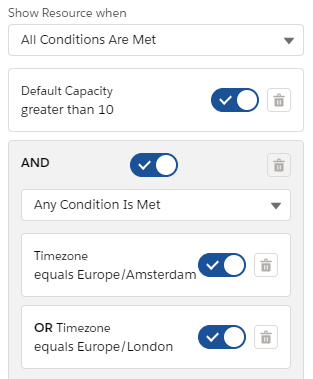
Advanced Filter Options
You can create more complex filters by adding additional filter items. You can do this by clicking the ‘Add Filter’ button again.
Add another filter by clicking the ‘Add Filter’ button again.
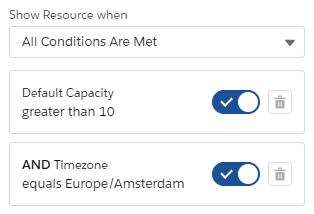
Change the behaviour of the filter from an AND to an OR by using the dropdown directly above the filter items.
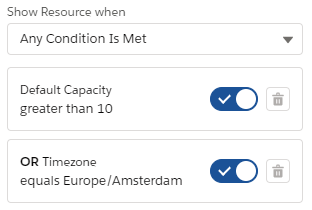
Use the ‘Add Filter Group’ button to make filters with nested AND/OR clauses.
Creating Global Filters
If a user has the ‘Create Global Filters’ permission, they can create filters that are visible to all users (depending on your sharing settings).
The process of creating global filters is very similar to creating personal filters. The only difference is in the choices to be made on the ‘New Filter’ modal.

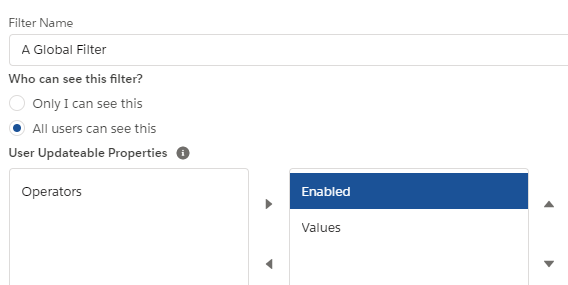
Under ‘Who can see this filter?’, select ‘All users can see this’ to make the filter global.
Under ‘User Updateable Properties’, select which filter item properties can be changed by individual users, by moving them from the left to the right column. This sets the defaults for new filter items, and can still be overridden on individual filter items.
Operators: users can change the operator of each filter item.
Values: users can change the comparison value of each filter item.
Enabled: users can toggle each filter item to apply or not apply.Save the filter and add filter items as described in the previous section.
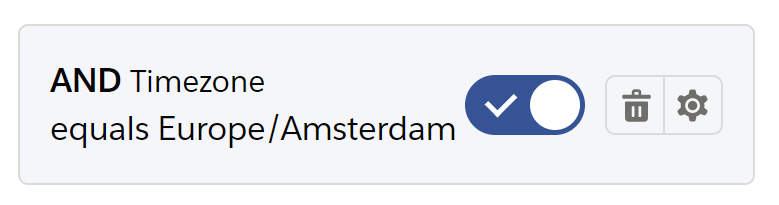
(Optional) On individual filter items, use the gear icon to set properties for that item.
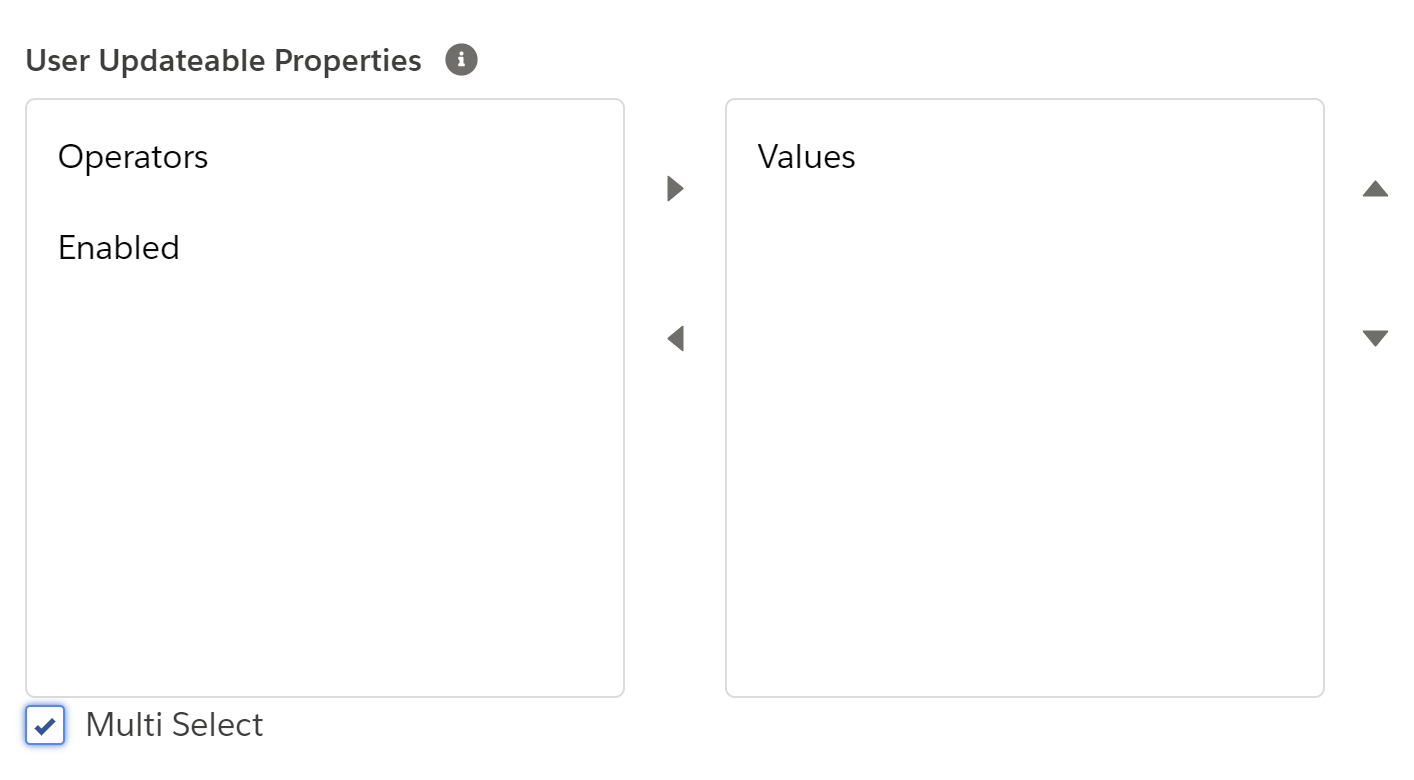
(Optional) Use the Multi-Select checkbox to make this filter item allow multi-selection. This means the user can select multiple values by hitting enter after each value. This will add a pill for the value, which can be removed again by clicking its cross icon.
| Info |
|---|
Both Personal and Global filters will add an option to clear the filter when there is a Selected Filter available. |
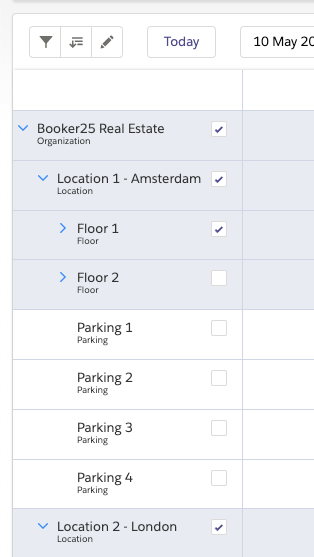
Using Dimension record filter
When you press the eye icon in the list of filters the calendars will show checkboxes on the dimension-records:
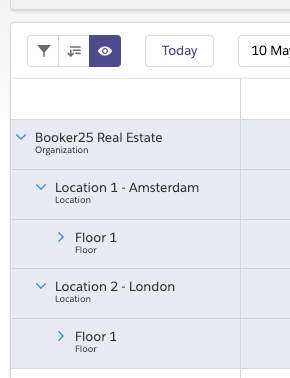
The eye-icon has changed to a pencil. All the checked boxes will be visible after you press the pencil icon.
The new list will look as follow:
| Table of Contents |
|---|