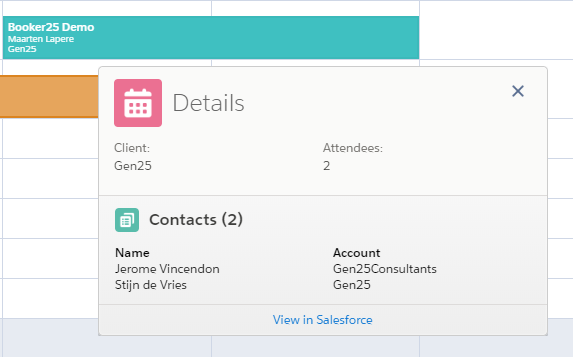
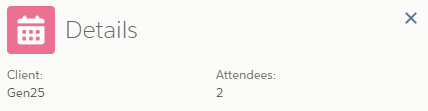
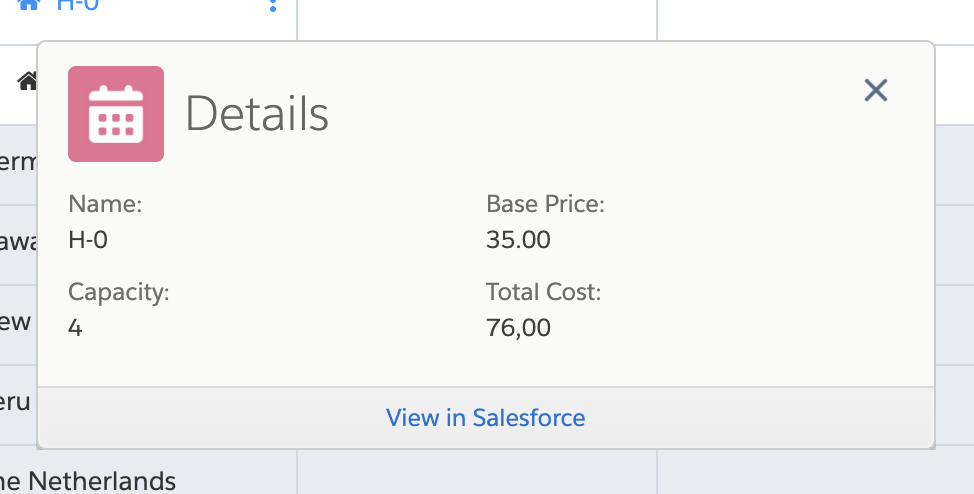
Hover Definitions let you customize the information in the popup that is shown to the user when they hover over a reservation on the calendar. You can not only display fields in this way, but also related lists.
Find the Hover Definition to edit
Go to the Reservation Display Contexts tab
Go to the 'All' listview, and find the row that you want to edit the hover for.
Info By default there is only one row in the Reservation Display Context list. If there are multiple and you're not sure which one to edit, check out this article for an explanation of how contexts are applied to reservations.
On the desired row, click on the record name in the Hover Definition column as pictured below:

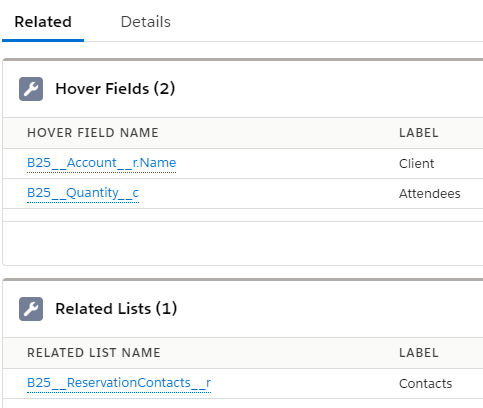
On the Hover Definition record, go to the Related tab and create Hover fields and Related Lists records to respectively add fields and related lists to the hover
Adding Hover Fields to the Hover
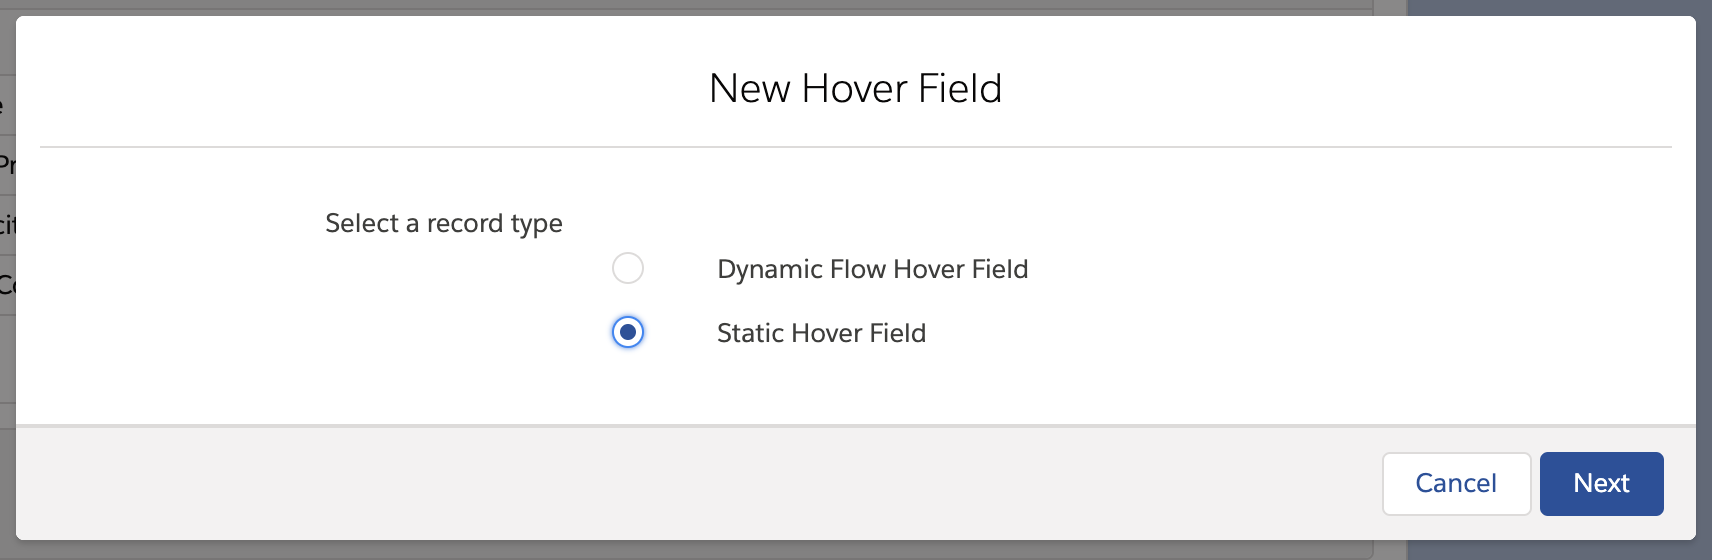
There are two types of hover fields which can be created: Static Hover Fields and Dynamic Flow Hover Fields. The Dynamic Flow Hover Fields are only relevant for the Resource Display Contexts.
Adding Static Hover Fields
In the top right corner of the Hover Fields related list, click New

- Select the Static Hover Field and click Next.
For the Name, enter the API name of a field that exists on the Reservation object. You can use cross object relationship names like B25__Account__r.Name.
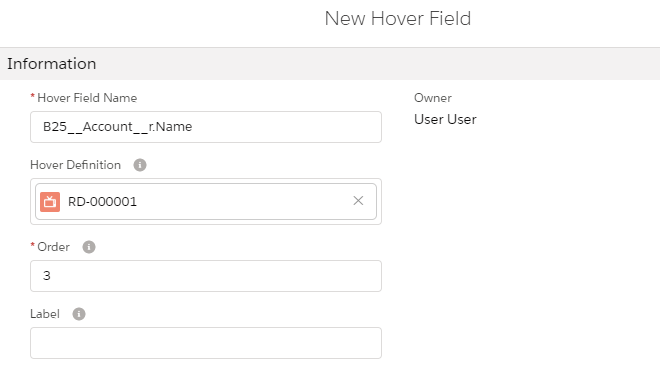
For the Order field, choose any number. The lower the number, the higher the field will be in the hover popup.
Optionally, give the field a Label. This will be displayed in front of the field value in the hover popup. If you leave this field empty, it will default to the label of the field itself as defined in Salesforce.
Adding Dynamic Flow Hover Fields
This type of hover fields are only valid for use in a Resource Display Context. Using this type of hover field, you can use a Flow to dynamically calculate values to be displayed on the Resource Hover using data from the calendar where the Display Context is being used. Let us first take a look at how to create a compatible Flow for the Dynamic Flow Hover Fields:
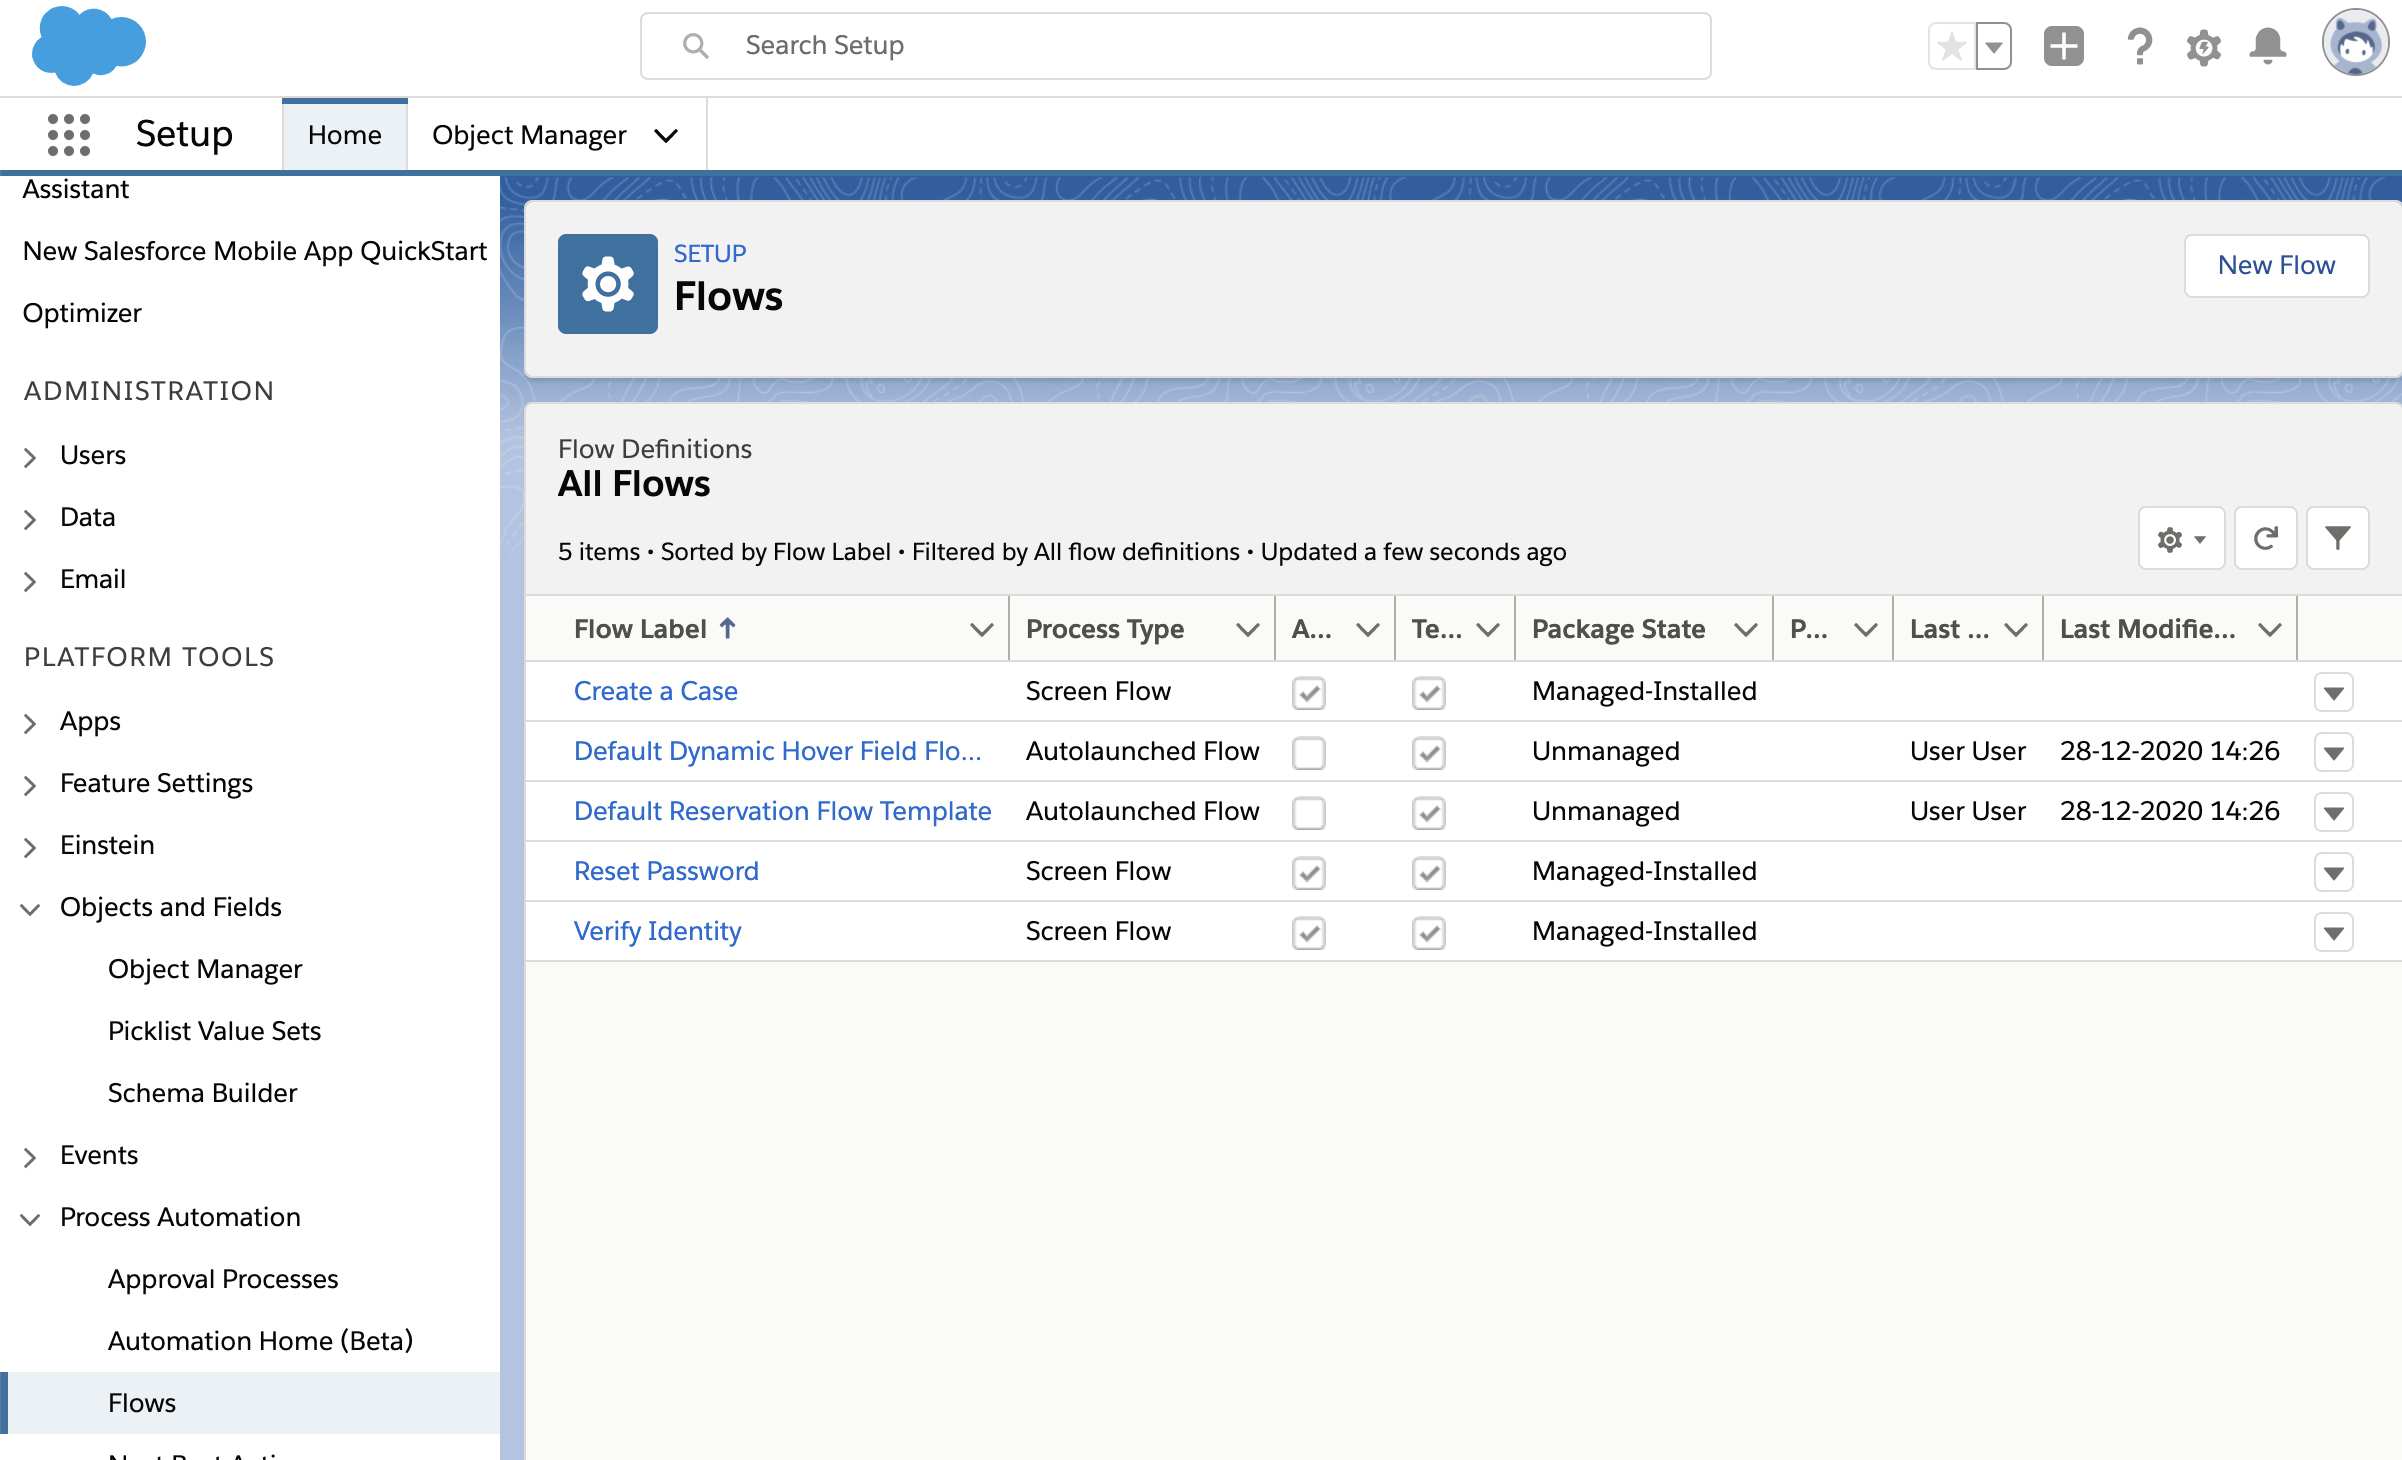
- Go to the Salesforce Settings, and open Process Automation > Flows. Then click on New Flow.
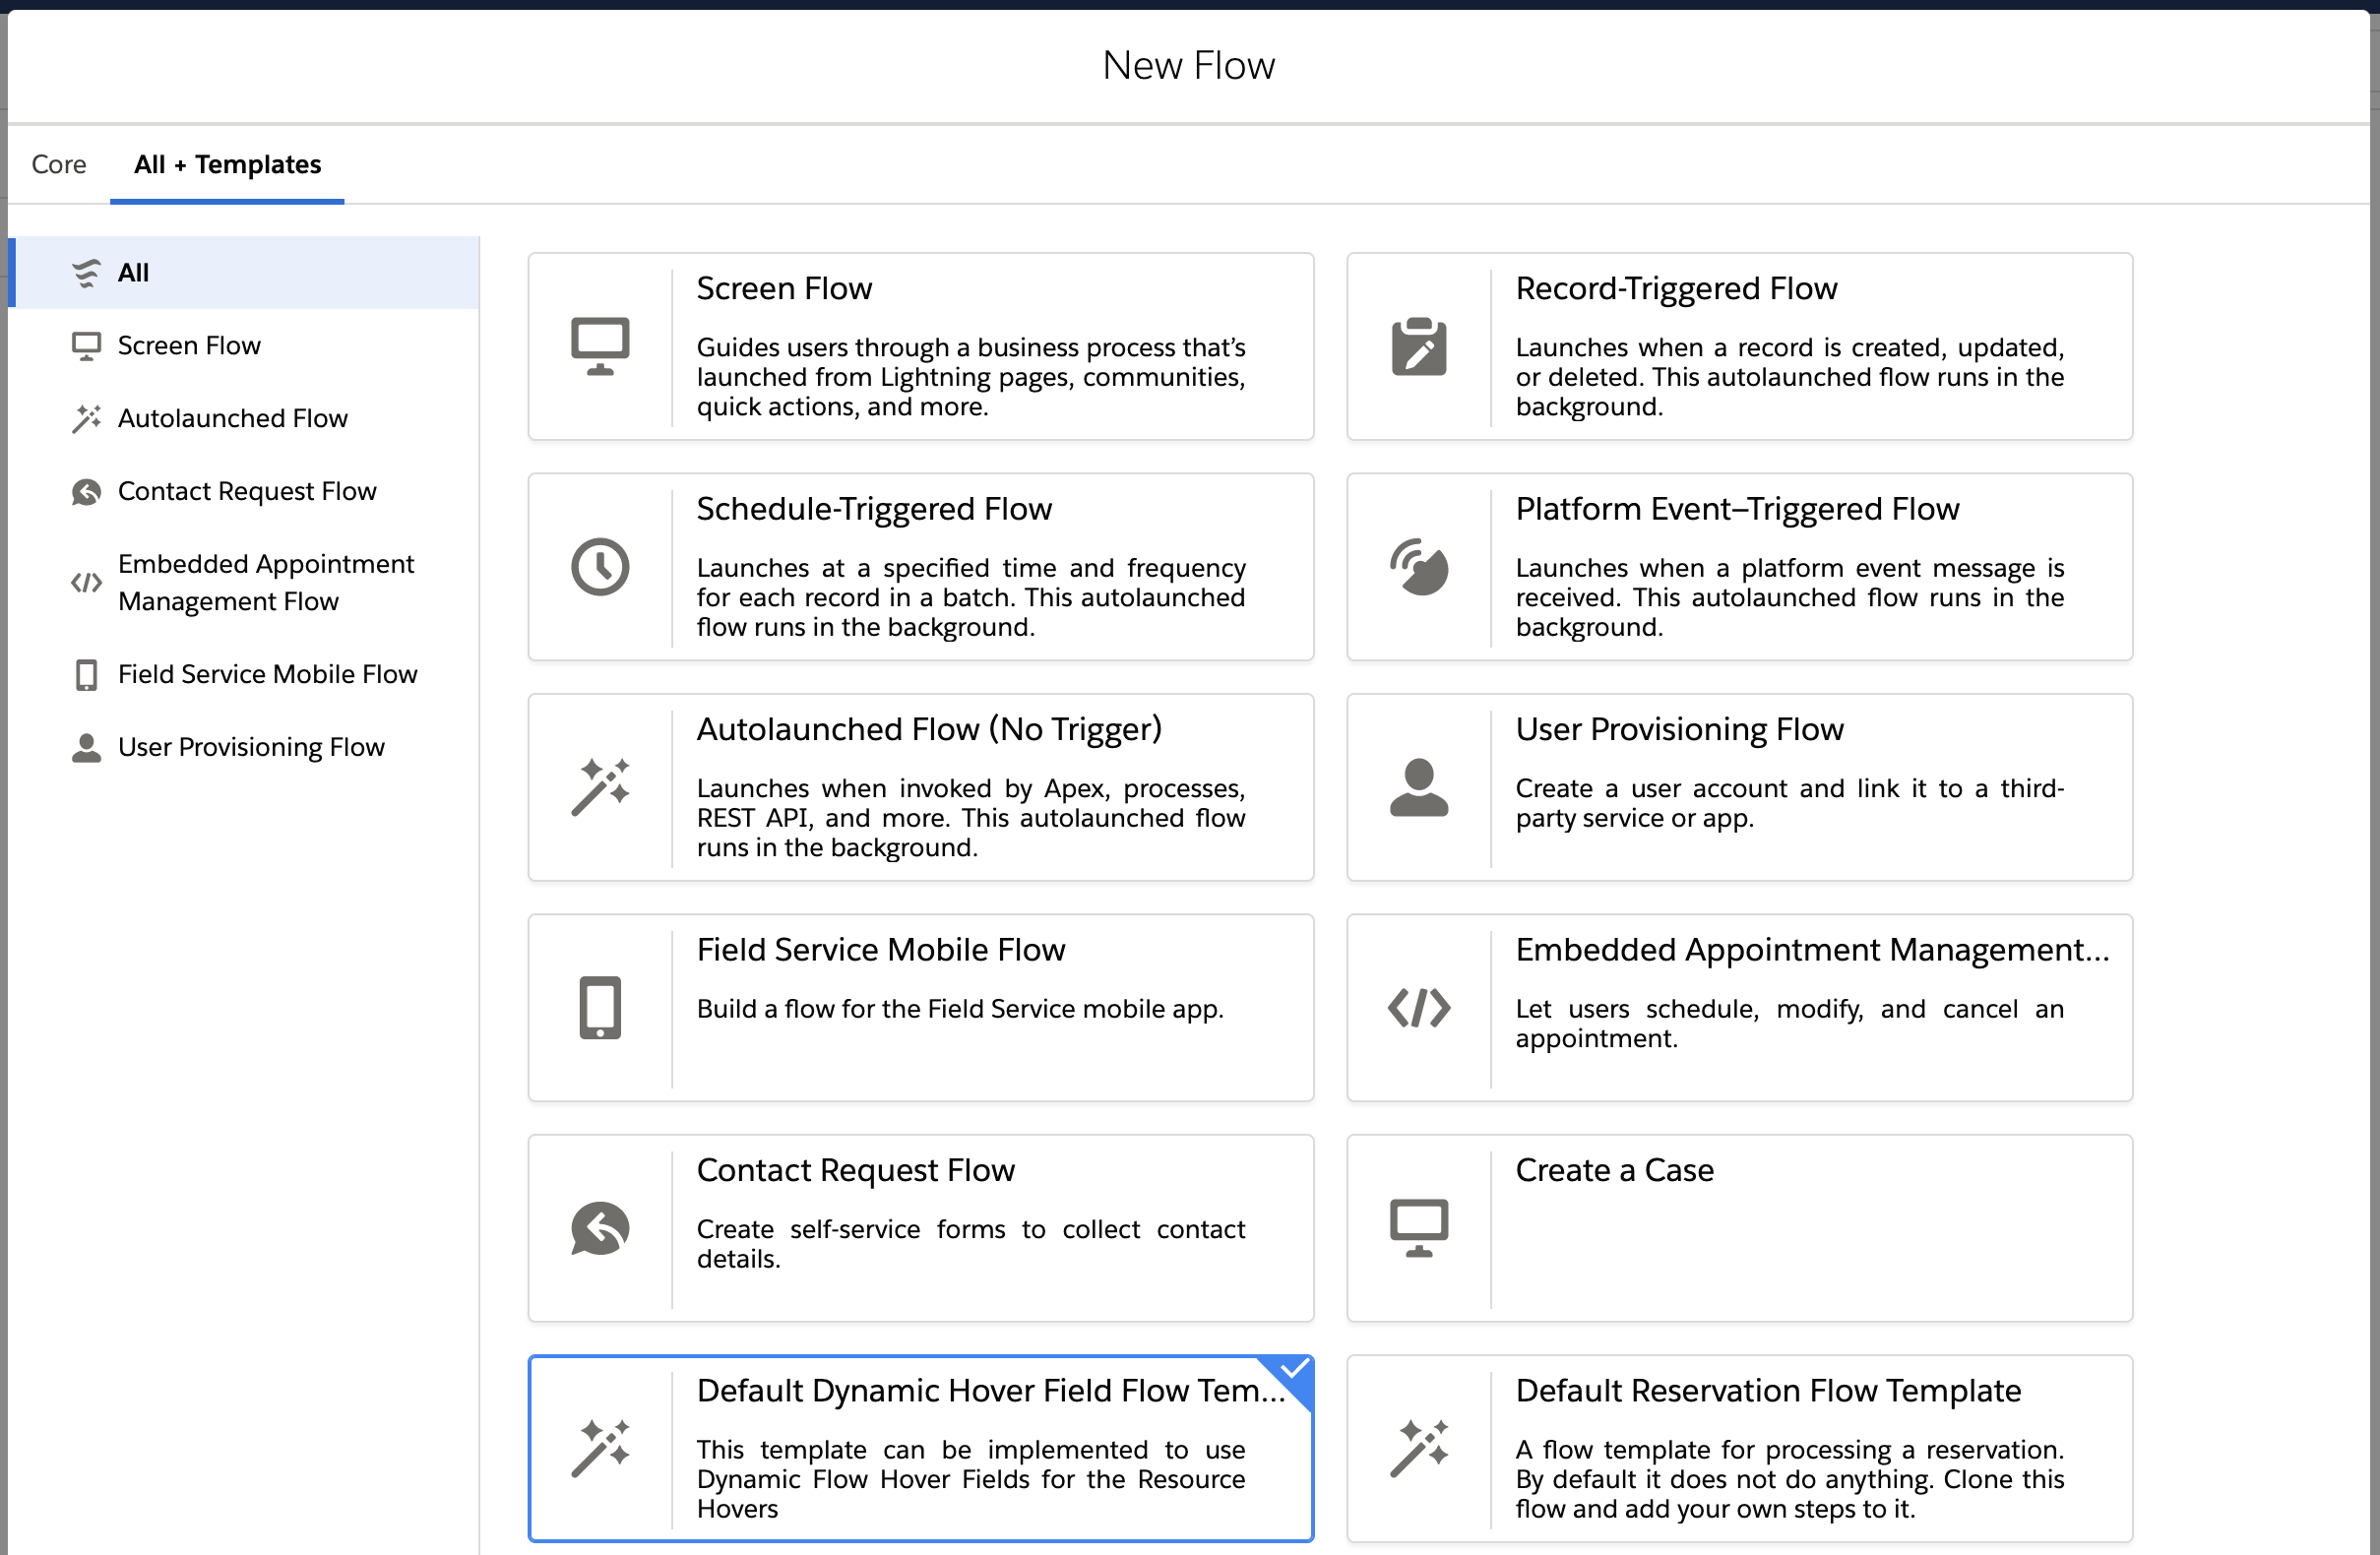
- Navigate to the All + Templates tab and choose the Default Dynamic Hover Field Flow Template. Then click Next.
- You can now create a flow using data available for a given resource for which the hover would be displayed. The following data is available in the Flow:
- Start Date
- End Date
- View Name
- Reservation IDs (for a given resource)
The result of the Flow should be stored in the variable 'outputField'. The value of this variable will be displayed on the hover.
Now that we have a valid Flow, we can move on to creating Dynamic Flow Hover Fields:
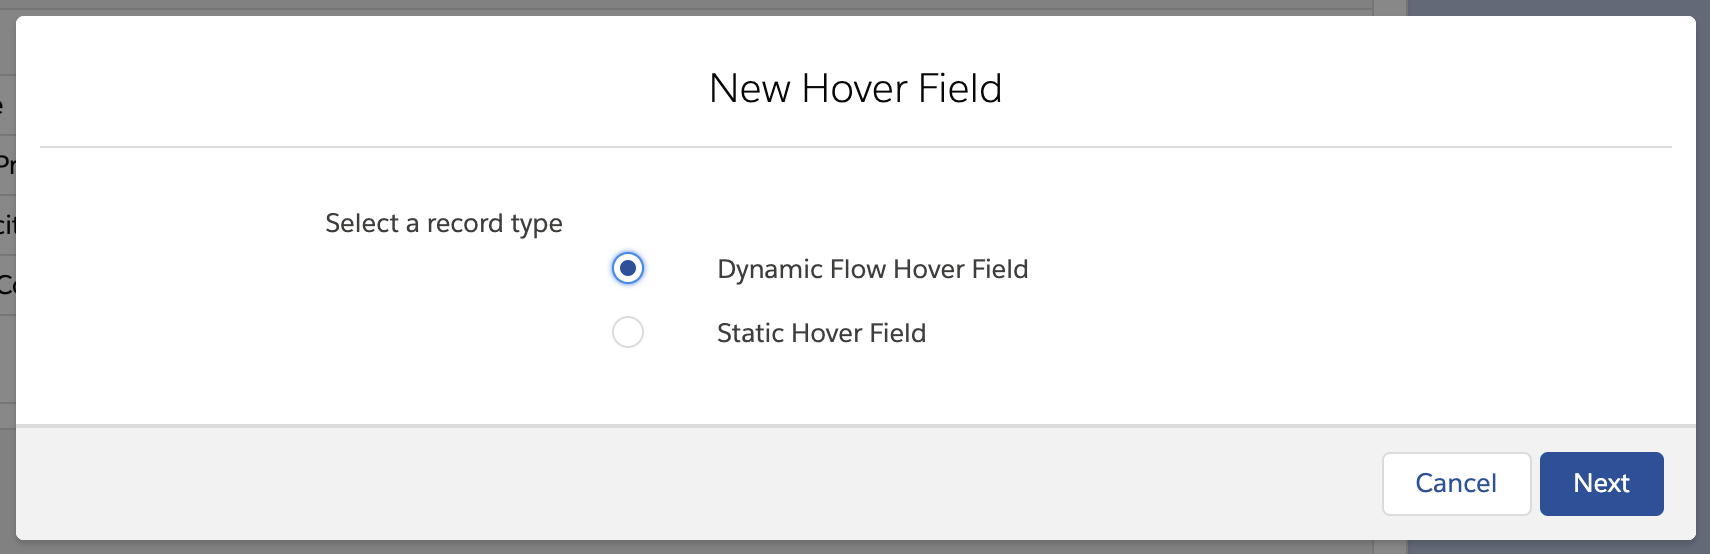
Navigate to the Hover Definition record and open the Related tab. In the top right corner of the Hover Fields related list, click New
- Select the Static Hover Field and click Next.
For the Name field, you can fill in a name of your choice. For the Flow Name field, fill in the API name of the Flow that you wish to us
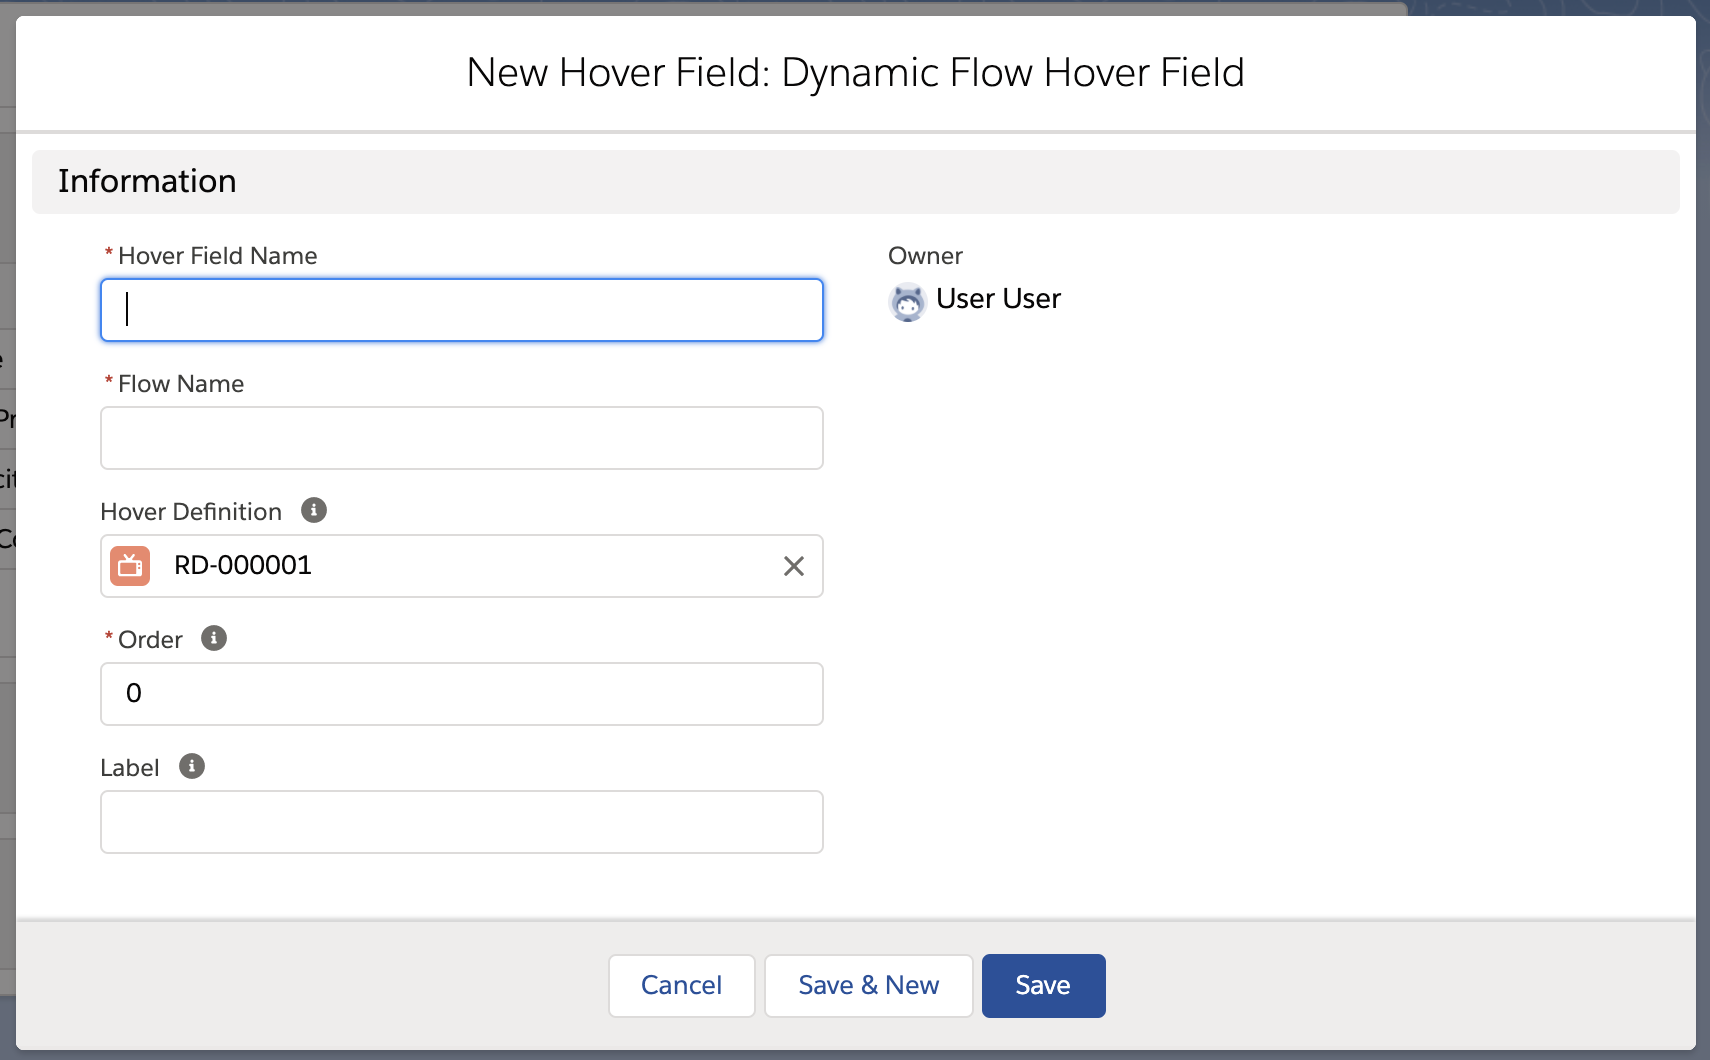
For the Order field, choose any number. The lower the number, the higher the field will be in the hover popup.
Optionally, give the field a Label. This will be displayed in front of the field value in the hover popup. If you leave this field empty, it will default to the API name of the flow.
Add Related Lists to the hover
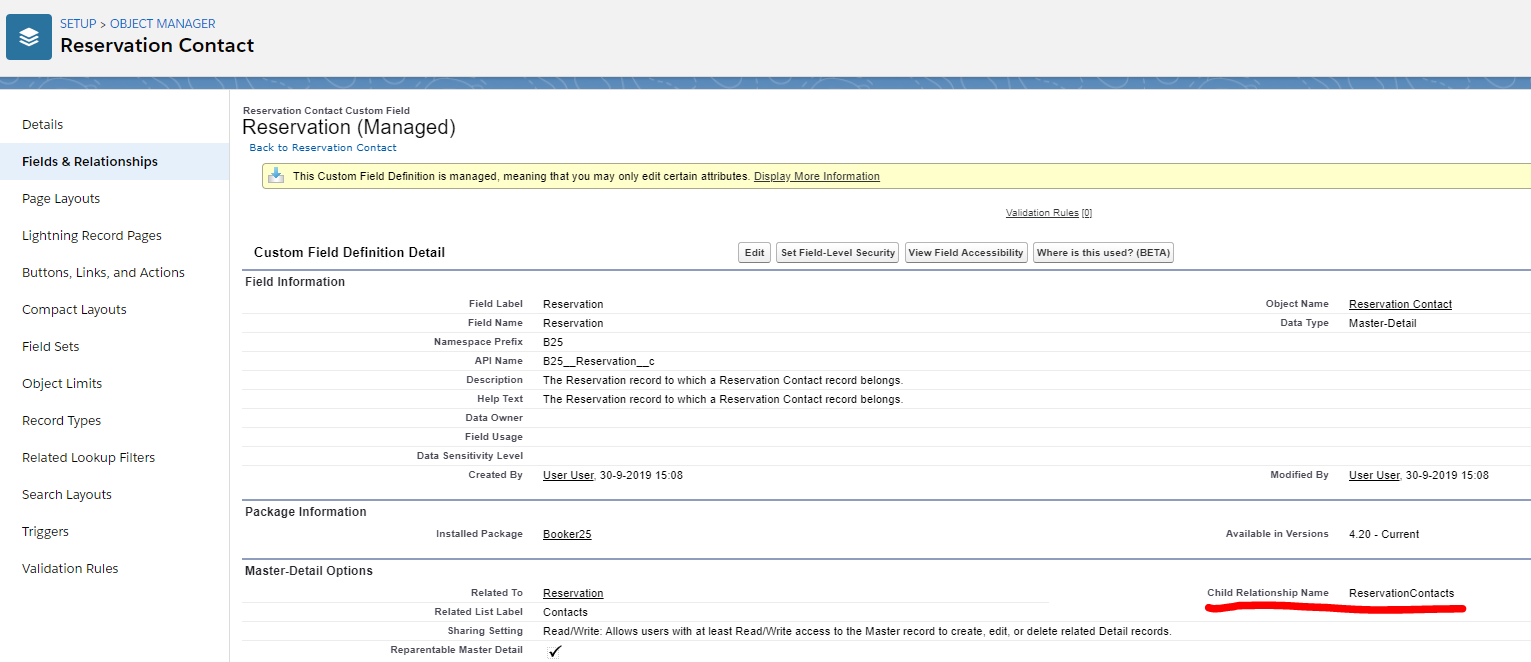
For Related Lists, make sure that the record names are the API names of a child relationship of the Reservation object. You can find this name by going to the lookup field of the child object, which points to the Reservation object. For namespaced lookups, you will need to prefix this name with the namespace. For custom fields you will need to append '__r' to this name. For example, the lookup in the screenshot below would result in the record name 'B25__ReservationContacts__r'.
When creating a Related List record, you will need to define which fields to display for each row in the related list in the hover. To do this, go to the Related List record, then to the Related tab, and add new Related List Fields records.

Related articles
| Filter by label (Content by label) | ||||||||||||||||||
|---|---|---|---|---|---|---|---|---|---|---|---|---|---|---|---|---|---|---|
|
| Page Properties | ||
|---|---|---|
| ||
|
| Panel | ||
|---|---|---|
| ||
|