| Info |
|---|
This article only applies to VisualForce calendars.
|
On VisualForce calendars, you can customize how the calendar dimensions (i.e. staff or resources) are filtered. You can create visible filters which can be adjusted by users on the calendar. You can also create hidden filters which are not visible to your users and therefore always apply.
Defining a filter for a checkbox (formula)
You can define a filter that checks for the value of a checkbox (or checkbox formula). Optionally, checkbox filters can be hidden from the calendar so that they always apply, and users won’t see any records that don’t meet the filter criterium.
Create the checkbox filter record (as an Admin)
Go to the appropriate Calendar config record.
On the Related subtab, create a new Filterable Field.
For ‘Filterable Name’, fill in the API name of a checkbox that exists on the Resource (or other dimension) sObject.
This can also be the API name of a checkbox formula, which allows you to create your own conditions.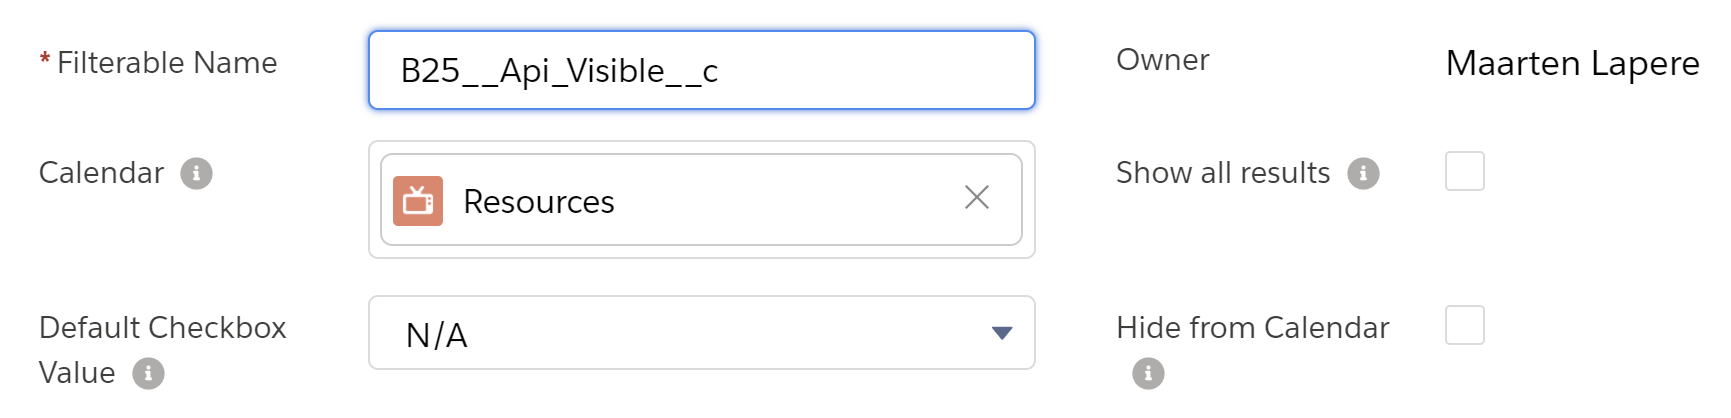
Leave all other fields to their default values.
Save the record.
Change the lookup filter (as a User)
Click on the filter icon in the top left of the calendar.
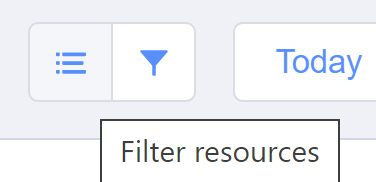
In the section ‘Custom Filter Fields’, the checkbox filter will now be visible.
Select a value, and click ‘Apply and Close’ in the bottom right of the filter panel.
The calendar is now filtered.
Defining a filter for a lookup
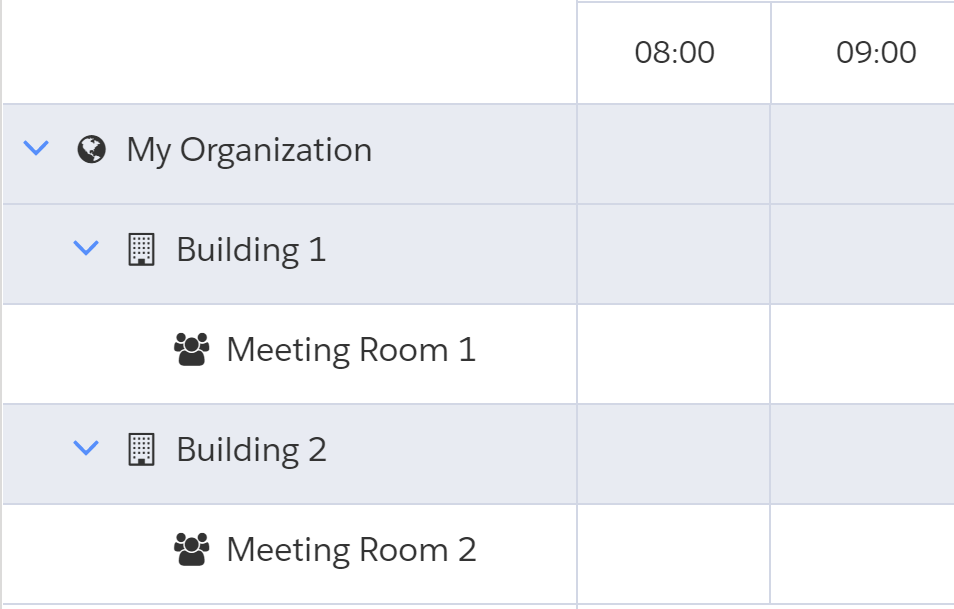
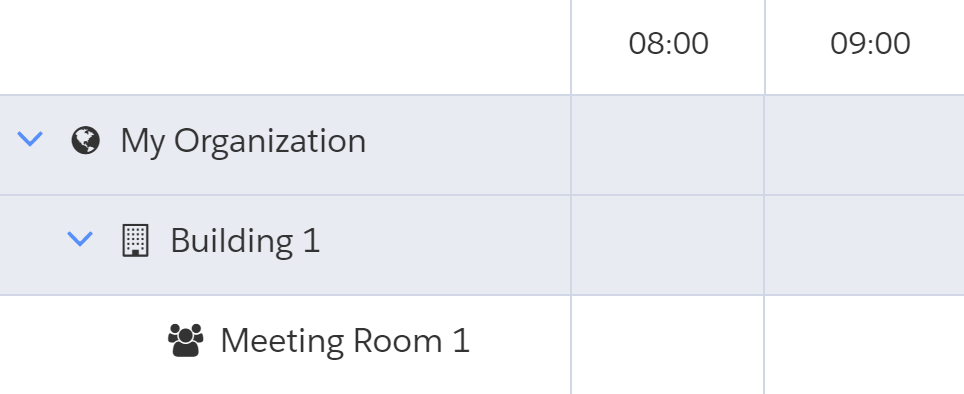
You can define a filter that checks for a value in a lookup field on the displayed dimensions. Say you have an organization with multiple buildings, and you only want to show one building at a time. You can do this by creating a lookup filter on the resource ‘Parent’ field.
Unfiltered calendar:
Create the lookup filter record (as an Admin)
Go to the appropriate Calendar config record.
On the Related subtab, create a new Filterable Field.
For ‘Filterable Name’, fill in the API name of the lookupa lookup that exists on the Resource (or other dimension) sObject.
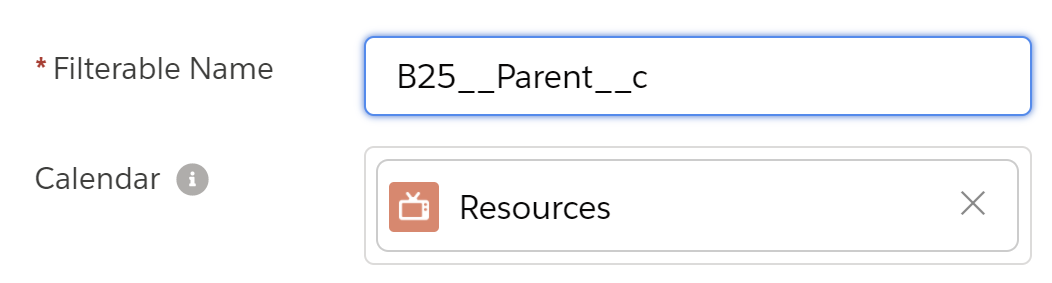
Leave all other fields to their default values.
Save the record.
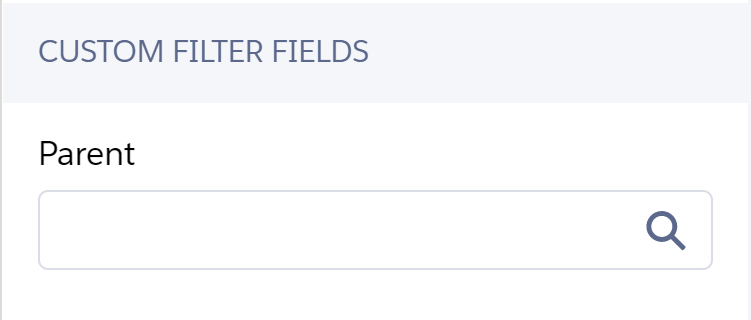
Change the lookup filter (as a User)
Click on the filter icon in the top left of the calendar.
In the section ‘Custom Filter Fields’, the lookup filter will now be visible.
Start typing in the lookup field, and a list of suggestions appears.
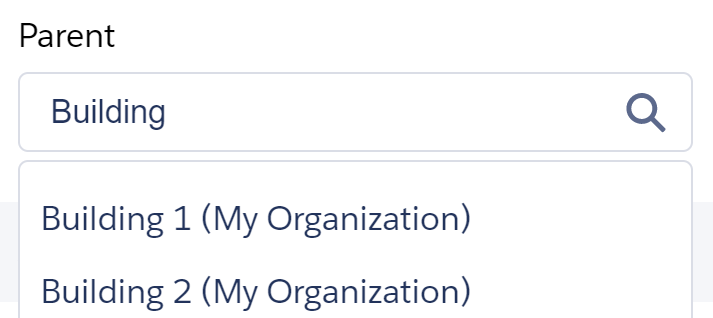
After selecting a value, click ‘Apply and Close’ in the bottom right of the filter panel.
The calendar is now filtered.
| Note |
|---|
If the lookup filter does not show a list of suggestions, this could be due to a known issue which can be solved by creating a tab for the object that the lookup refers to. |
Related articles
| Filter by label (Content by label) | ||||||||||||||||||
|---|---|---|---|---|---|---|---|---|---|---|---|---|---|---|---|---|---|---|
|
| Page Properties | ||
|---|---|---|
| ||
|
| Panel | ||
|---|---|---|
| ||
|